Understanding Your Camera's Settings (Cheat Sheet)
Venturing into manual mode can be both an exciting and daunting experience.
For many photography enthusiasts, venturing into manual mode can be both exciting and daunting. While it offers unparalleled creative control, understanding and mastering the various camera settings can feel overwhelming at first. In this cheat sheet, we'll break down the essential camera settings in manual mode, empowering you to take control of your photography and capture stunning images.
1.Shutter Speed
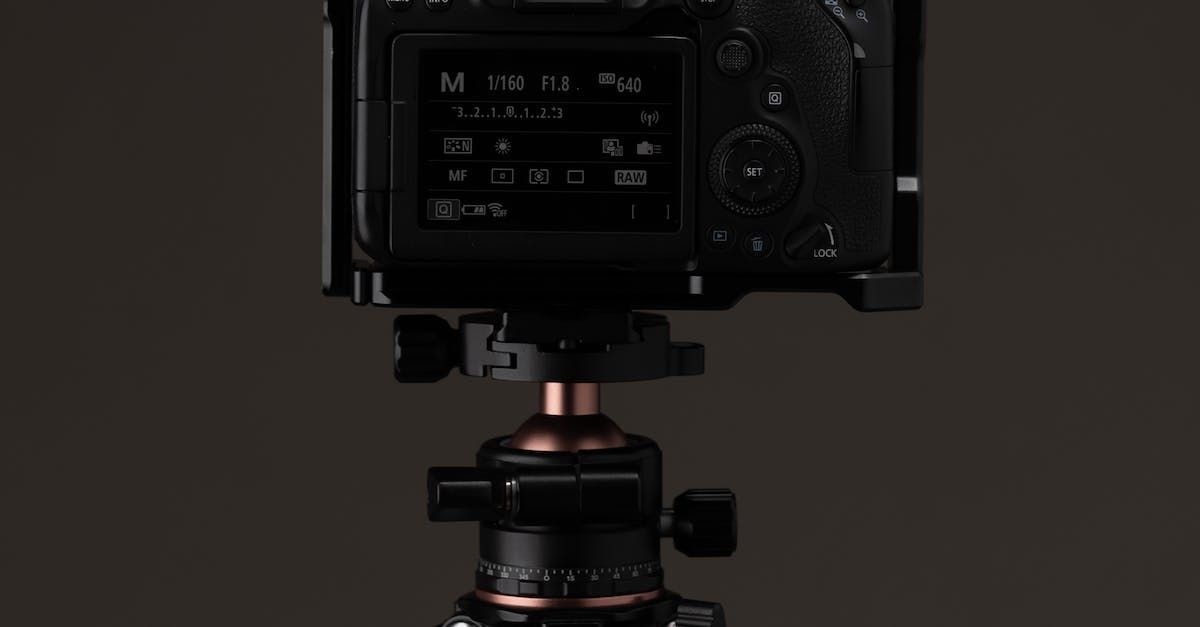
Shutter speed refers to the amount of time your camera's shutter remains open, allowing light to enter the sensor. It is measured in seconds or fractions of a second (e.g., 1/500, 1/1000). Fast shutter speeds freeze motion, ideal for action shots or capturing moving subjects. Slow shutter speeds, on the other hand, create motion blur, great for capturing flowing water or long exposure shots.
2.Aperture
Aperture is the opening in you camera's lens that controls the amount of light reaching the sensor. It is represented by f-stops (e.g., f/2.8, f8, f16). A lower f-stop (e.g., f2.8) results in a wider aperture, allowing more light and creating a shallow depth of field, perfect for portraits with blurred backgrounds. A higher f-stop (e.g., f/16) creates a smaller aperture, suitable for landscapes, where you want everything in focus.
3.ISO
ISO measures the sensitivity of your camera's sensor to light. Lower ISO settings (e.g., ISO 100) are ideal for bright conditions, resulting in cleaner images with less noise. Higher settings (e.g., ISO 1600, ISO 3200) are used in low-light situations but can introduce noise, so use them sparingly.
4.Exposure Triangle
The exposure triangle is the relationship between shutter speed, aperture, and ISO. Adjusting one setting affects the others, so understanding this balance is crucial for achieving the desired exposure. For example, if you increase your shutter speed, you may need to widen your aperture or increase your ISO to maintain proper exposure.
5.White Balance
White balance determines the color temperature of your images. Different lighting conditions cast different color tints on your photos. Setting the appropriate white balance (e.g., daylight, cloudy, tungsten) ensures accurate and natural-looking colors.
6.Metering Mode
Metering mode determines how your camera measures the light in a scene. The most common metering modes are matrix/evaluative, center-weighted, and spot metering. Choose the mode that best suits your subject and lighting conditions.
7.Focus Mode
Select the focus mode that suits your shooting style and subject . Single-shot autofocus (AF-S) locks focus when you half-press the shutter button, ideal for still subjects. Continuous autofocus (AF-C) tracks moving subjects, ensuring they remain in focus.
8.Exposure Compensation
Exposure compensation allows you to override your camera's metering and adjust the exposure to make images brighter or darker. Use this setting to fine-tune your exposure, especially in tricky lighting situations.
9.RAW vs. JPEG
Choose between shooting in RAW or JPEG format. RAW files retain more information and offer greater flexibility in post-processing but requires more storage space. JPEG files are smaller and ready to share but have less latitude for adjustments.
10.Bracketing
Bracketing takes multiple shots at different exposures. This technique is useful for high-contrast scenes, allowing you to merge images later for a balanced exposure.
Manual mode gives you complete creative control over your photography, enabling you to achieve your vision and create stunning images. By understanding the fundamentals of shutter speed, aperture, ISO, and other camera settings, you can confidently explore the exciting possibilities of manual mode. Use this cheat sheet as a handy reference, and with practice and experimentation, you'll unlock the full potential of your camera and elevate your photography skills to new heights. Happy shooting!